
This post is the first in a two-part series which covers Railway, a platform that makes deploying applications simple and easy.
In this part, we’ll create a simple full-stack Clojure app and deploy it to the web using Railway.
There Must Be a Better Way
One of my long-term goals is to work for myself building products with software. This would give me the freedom to work on things I care about, while making more money and maximizing my free time.
I’ve always known that to do this, I need to learn how to actually deploy an application.
I looked into AWS in the past, but it seemed too daunting to learn, so I stayed away out of fear. Docker and Kubernetes didn’t seem any easier, and I consider the latter to be overkill even for many enterprise applications.
I wanted a solution that didn’t require me to learn a complicated toolset or force me to organize my project in a special way just to get it deployed.
But it wasn’t until I actually needed to deploy some code that I searched for a better option.
Necessity is the Mother of Discovery
I recently interviewed with a company that had me work on a take-home project as part of their interview process. The end product needed to be a full-stack web application deployed to the web.
Before I even started building the application, I knew I would need to figure out how to deploy it. I had never done this before, since all of the companies I worked for in the past had a DevOps or Infrastructure team that set up our deployment pipelines for us.
This time, I was on my own.
I looked into Heroku and Vercel before settling on Railway after hearing about it in a YouTube video comparing it to other platforms.
Create the App
Railway can deploy an application directly from a GitHub repository, so we’ll start by creating a new application before publishing it to GitHub.
For the application, we’ll create a full-stack Hello, World! app that displays a message pulled from our database and returned by an endpoint.
Let’s start by creating a new application using the reagent template. To do so, open your terminal and navigate to the path where the project will reside. Then, run the following command:
lein new reagent full-stack-hello-world
Next, navigate into the newly-created directory with the command below.
cd full-stack-hello-world
Getting the App into GitHub
Create the Repository in GitHub
Log in to your GitHub account. Then, click the green New button at the top left to create a new repository.
Next, enter full-stack-hello-world as the name of the repository. Feel free to enter a description of your choice and set the visibility to Private, if you would like. Then, click the Create repository button at the bottom right.

Connect Your Local Git Repository to GitHub
Back in your terminal, run the command below in your full-stack-hello-world directory to initialize your local git repository.
git init
Add all project files to the staging area:
git add .
Commit your changes:
git commit -m "Initial commit"
Connect your local repository to the remote GitHub repository, substituting <repository_URL> with the appropriate value1:
git remote add origin <repository_URL>
Push your local code to GitHub:
git push -u origin main
Deploy the App to Railway
With your repository in GitHub, let’s create a Railway account so we can point it to your repo.
Start by navigating to railway.com and create an account. Logging in with your GitHub account will make connecting to your repository easier, but it’s not required.
From your Railway dashboard, click the New + button at the top right to create a new project.
Select GitHub Repo from the drop-down2.

Next, click the full-stack-hello-world repository we just created from the drop-down. You may have to refresh the page for the new repository to show up in the list. Once you click the repository, the deployment will start.
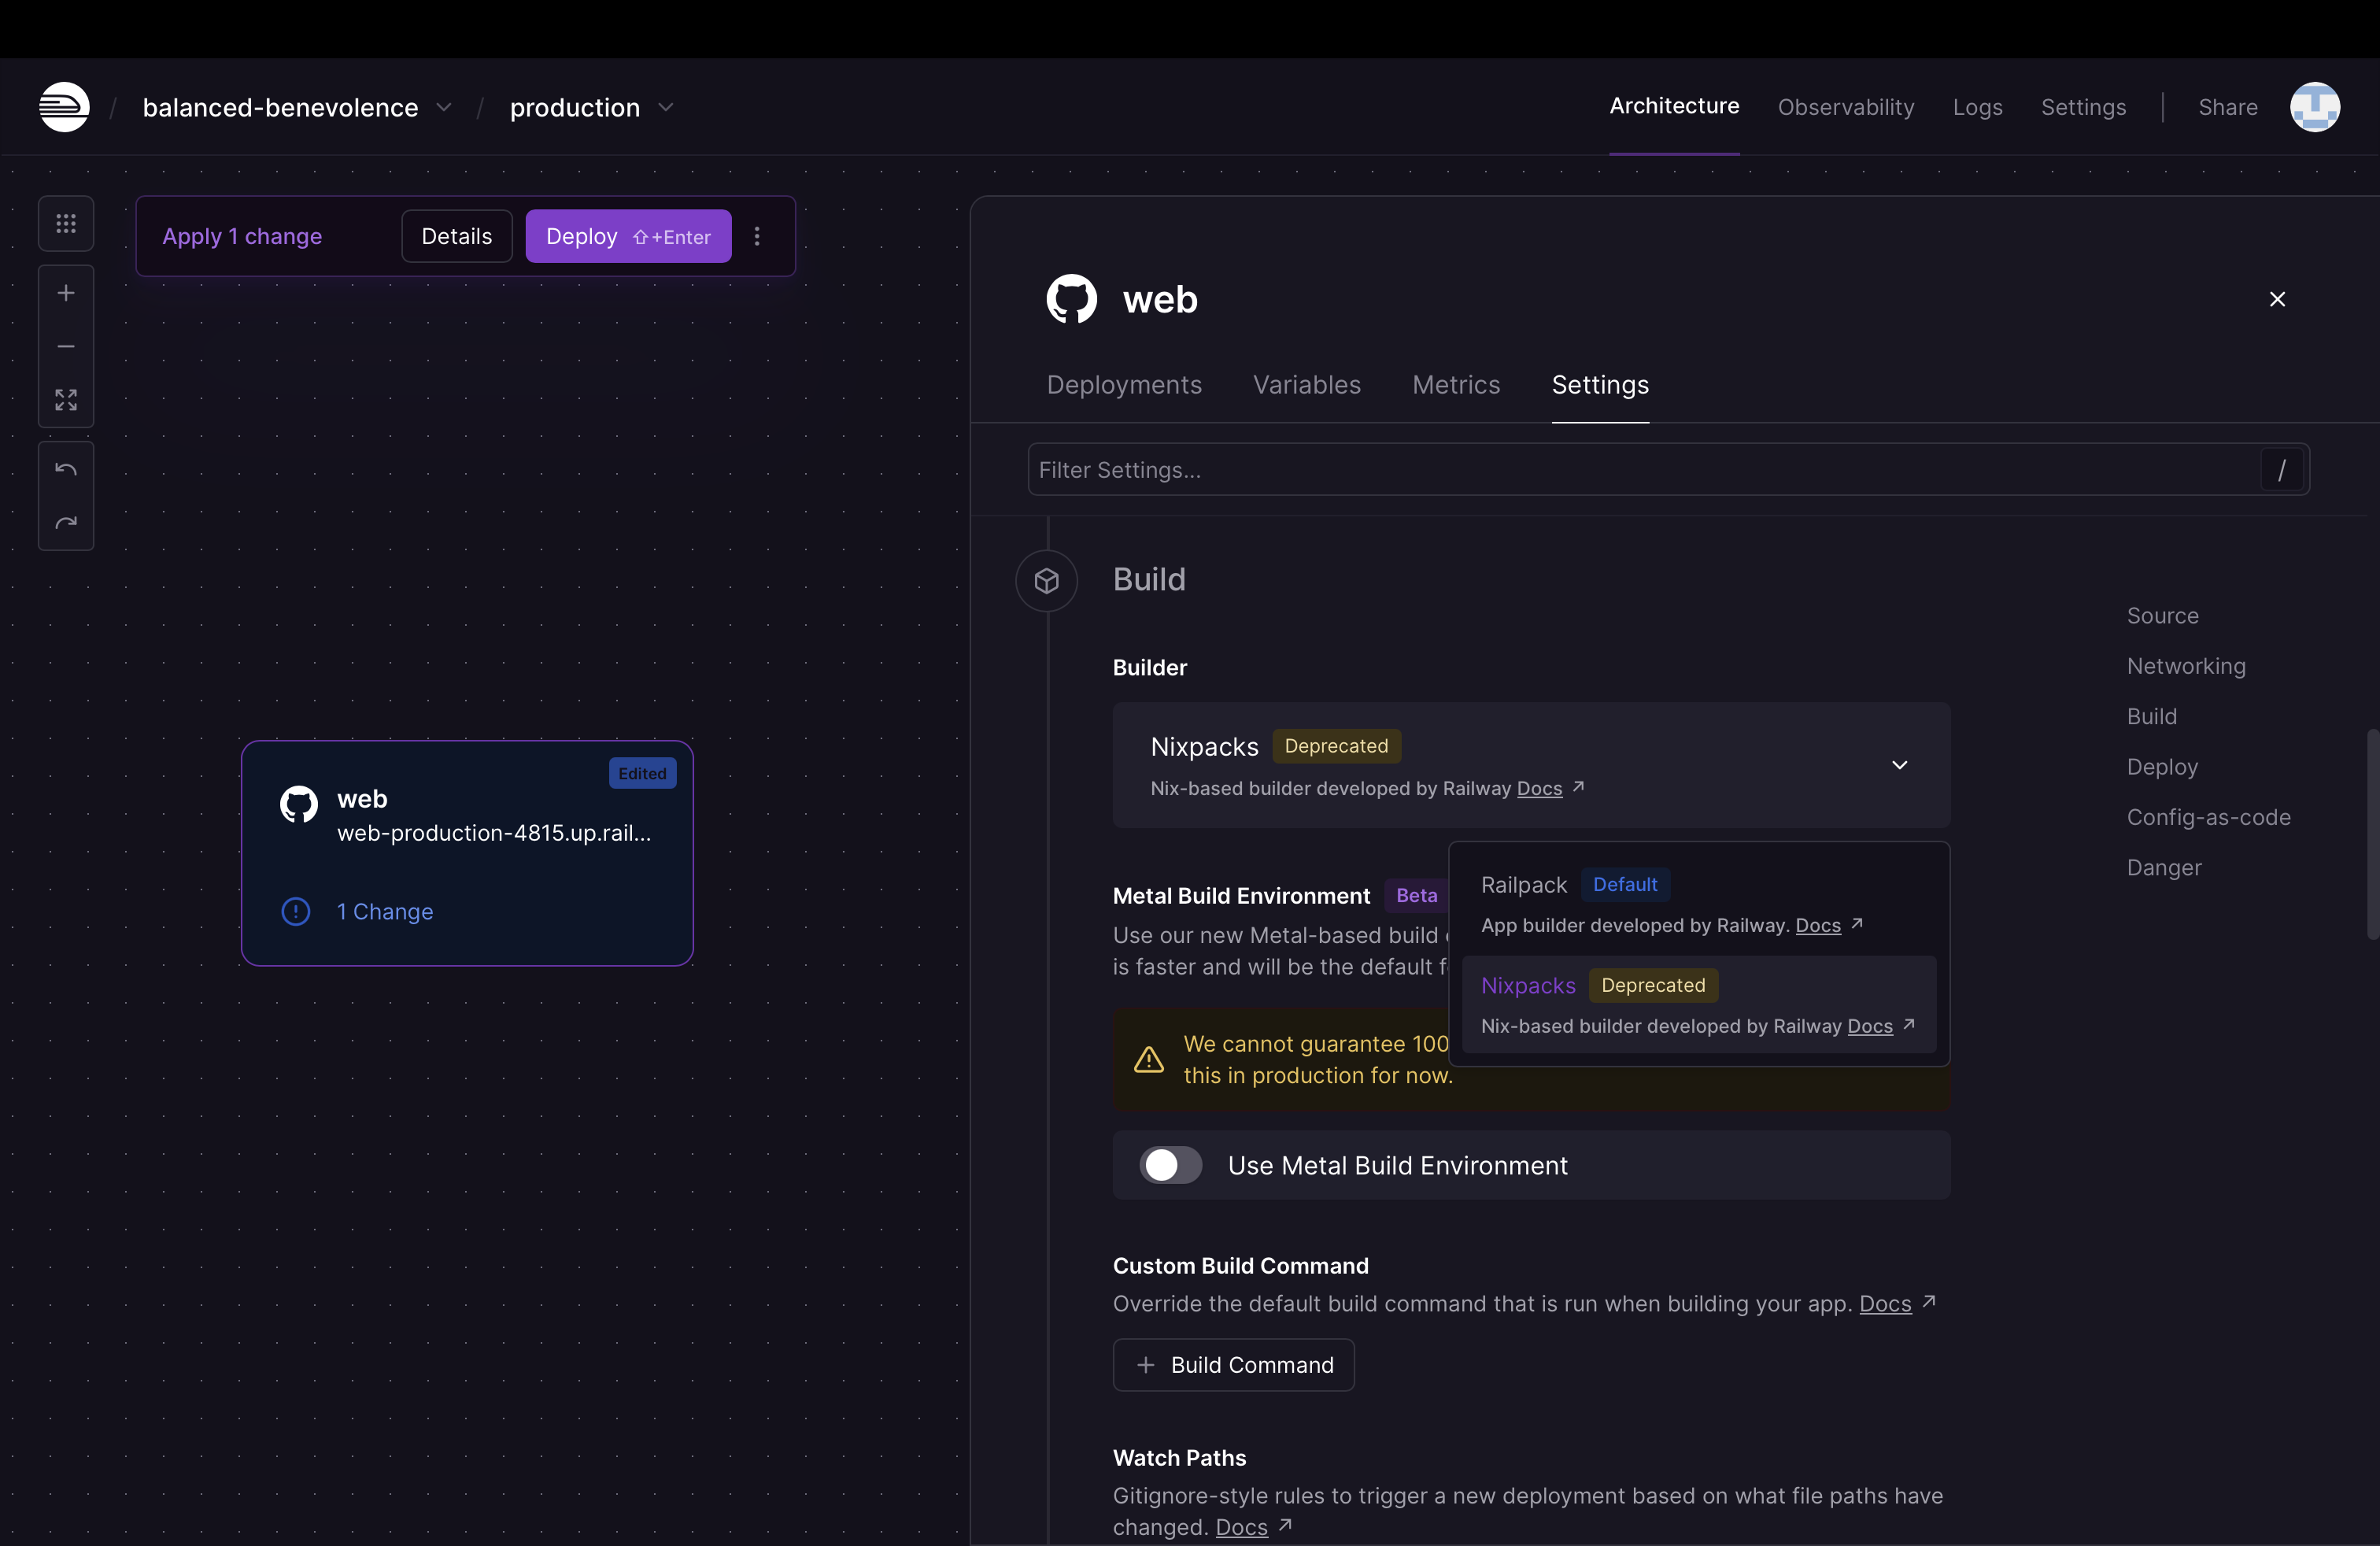
At the time of this writing, there is a bug in Railway’s new Railpack builder. The bug incorrectly identifies the project as a node.js application and tries to build it as such. As a result, this initial build will fail.

Until Railway fixes this, we’ll need to use the Nixpacks builder instead. Go into the Settings tab and change the Builder to Nixpacks. Then, click Deploy at the top left.
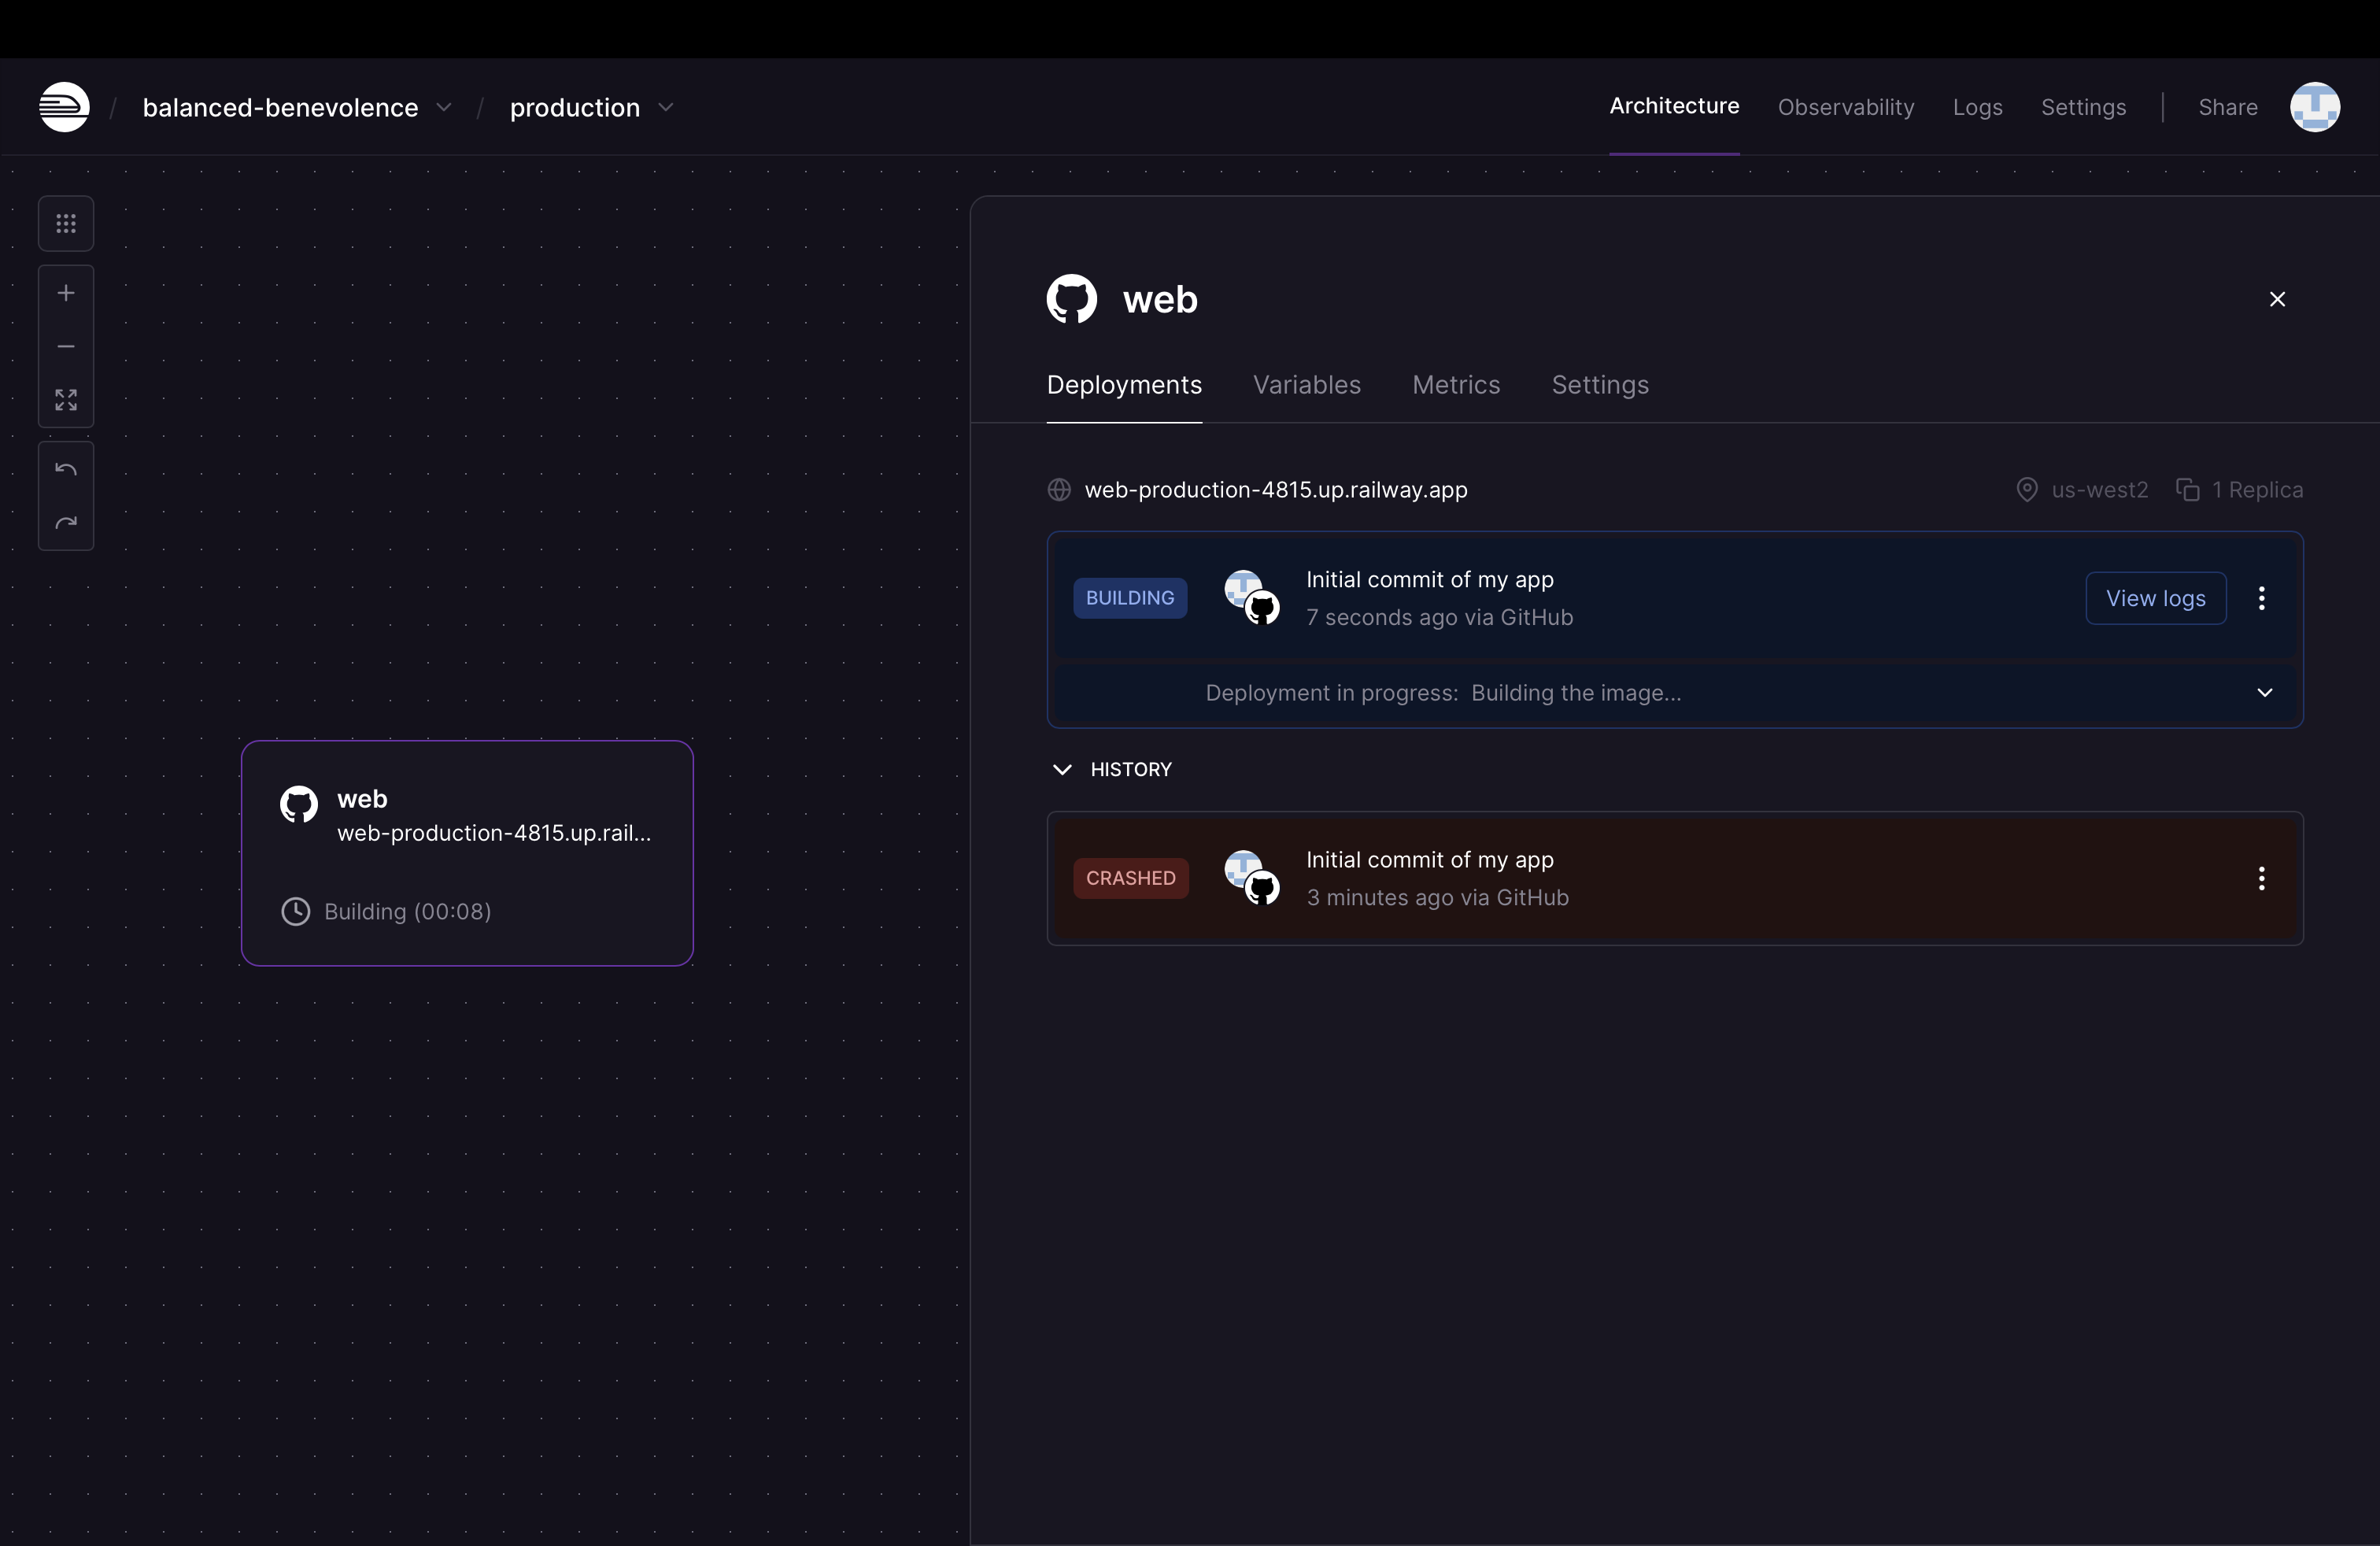
The first deployment may take around 5 minutes.
Once completed, the status will show as Active.
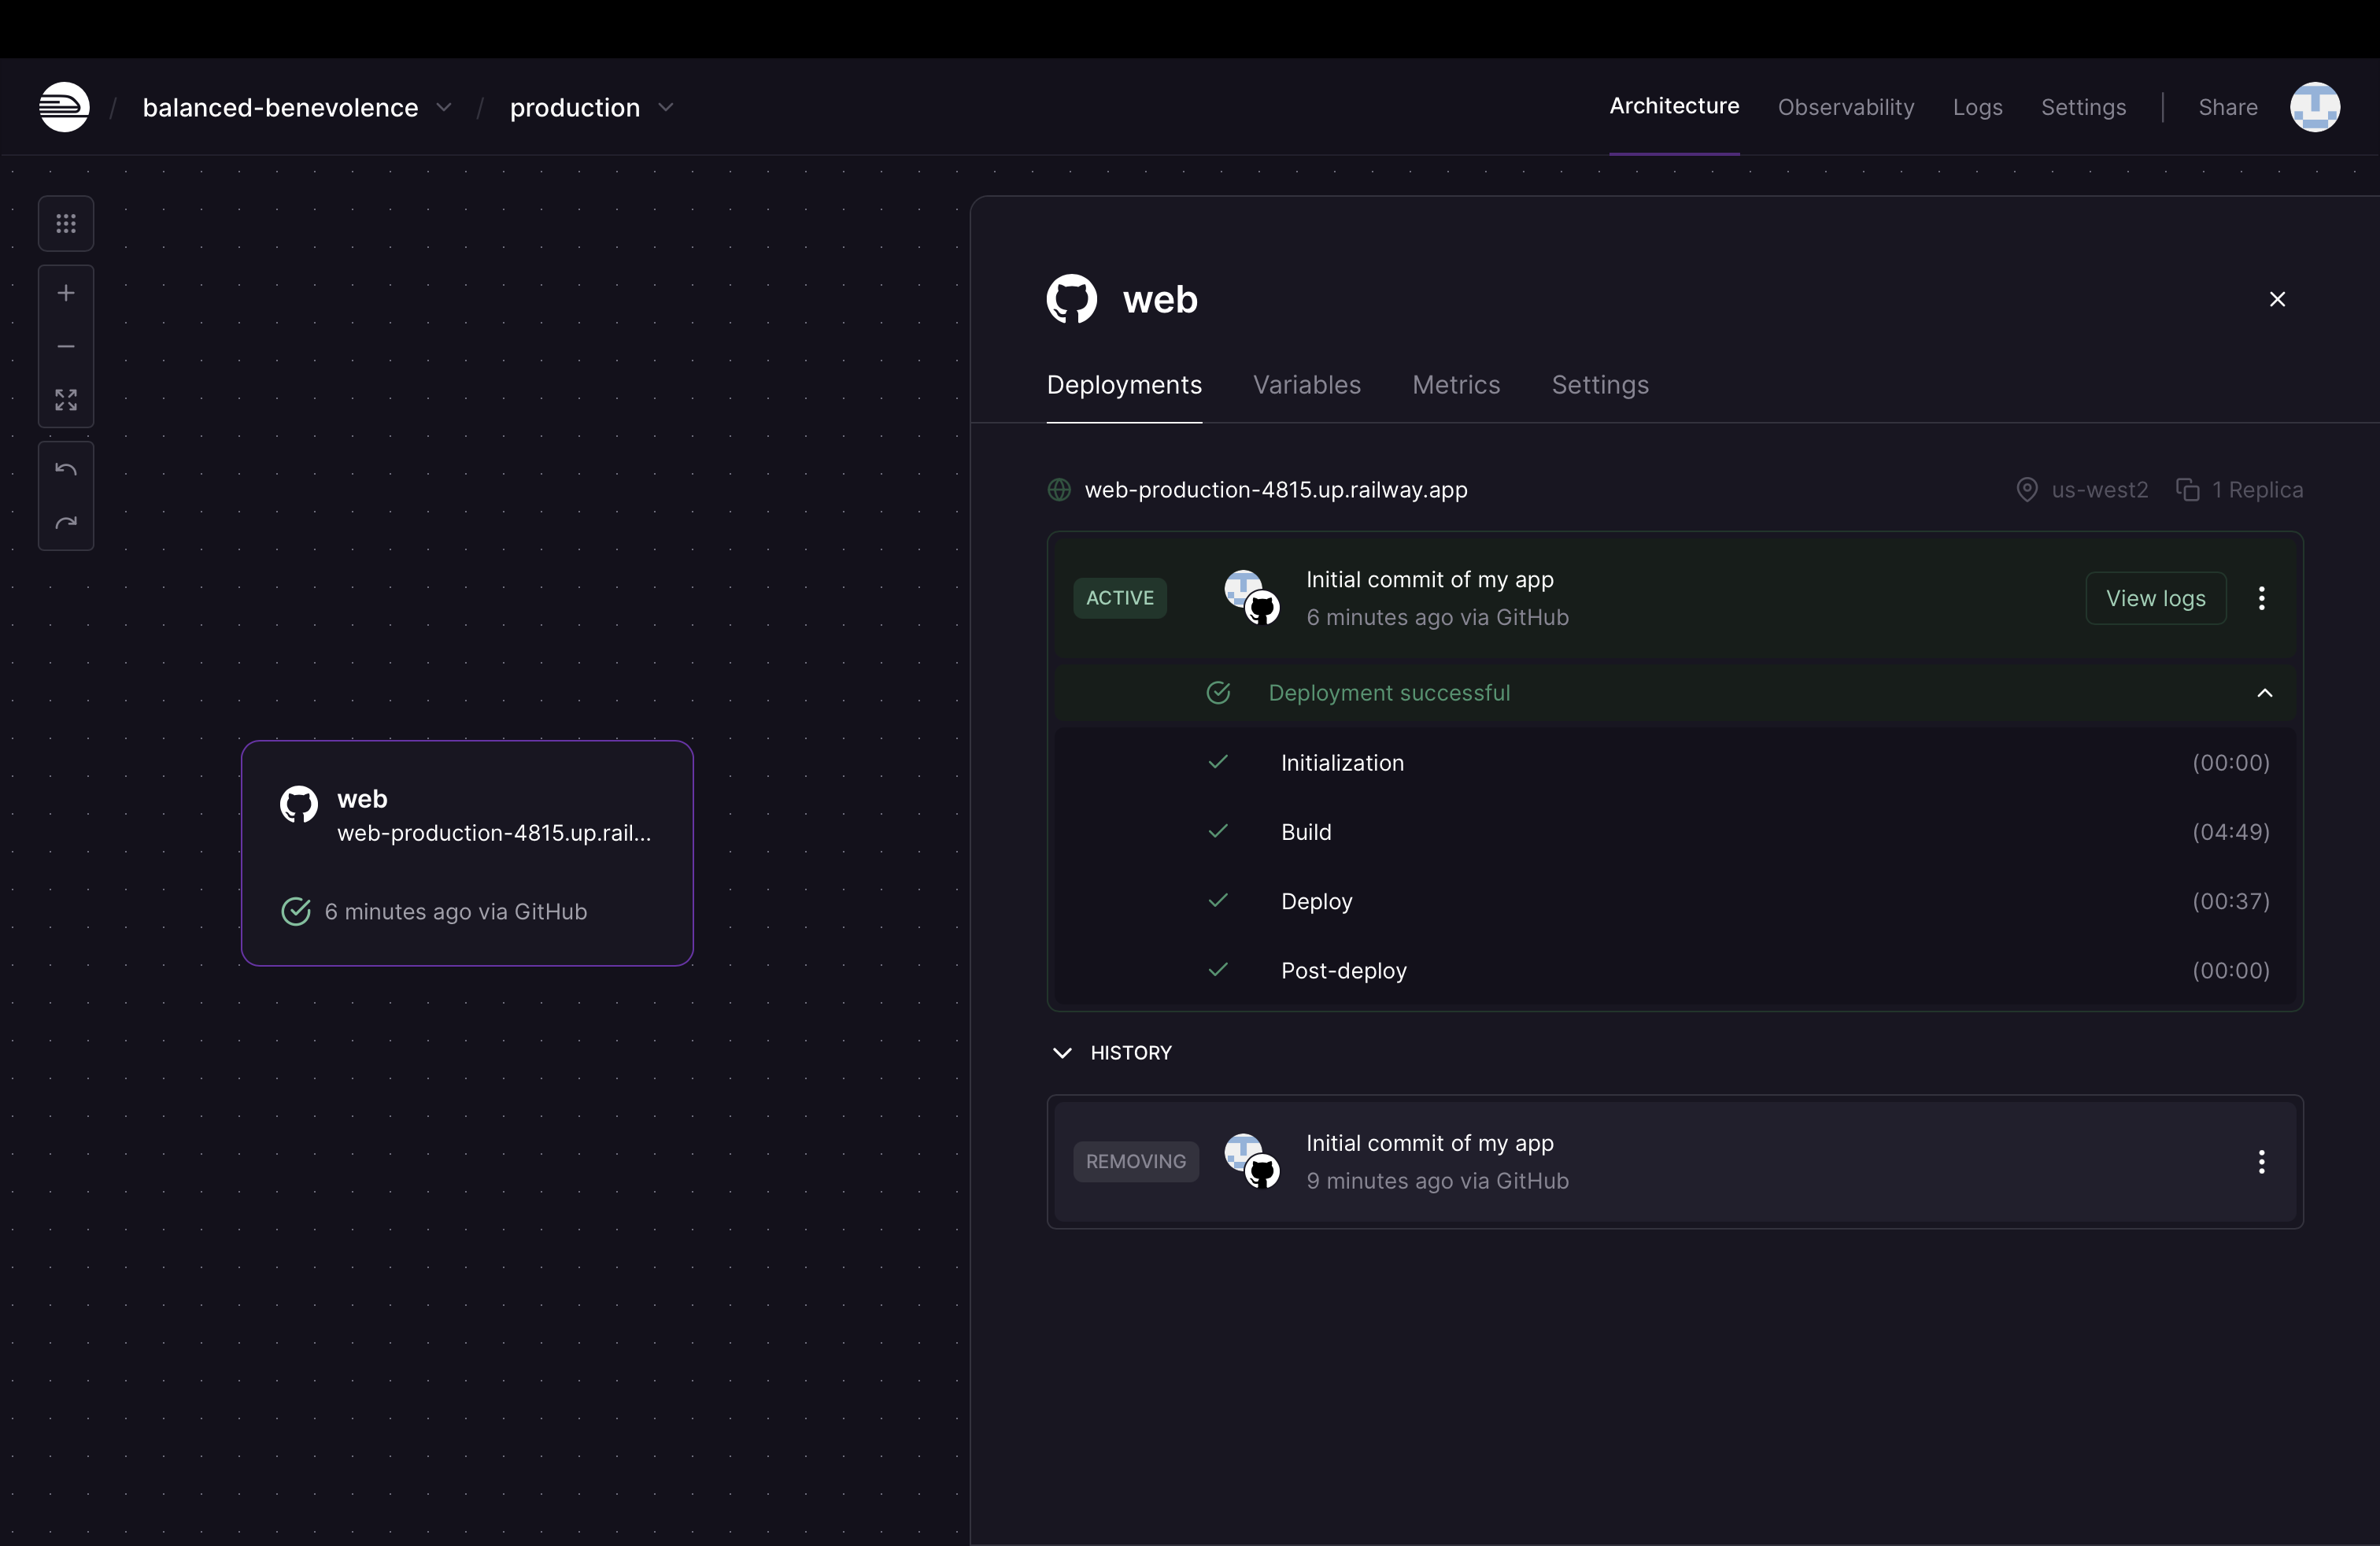
Click the URL at the top left corner of the Deployments tab to open the application in your browser. It should be called something like web-production-XXXX.up.railway.app.
You should see our Reagent skeleton application come up with the message Welcome to full-stack-hello-world.

Congratulations! You just deployed a full-stack Clojure application to the web.
Conclusion
As you just saw, Railway makes it super easy to get a Clojure application deployed to the web. All you have to do is point it to your GitHub repository and Railway will take care of the rest.
In Part 2, we’ll add a database to our project and an API endpoint to our backend and wire it all up.
Footnotes
- You can get the value for
repository_URLfrom your repository’s home page on GitHub. In my case, I ran:git remote add origin git@github.com:vatchedj/full-stack-hello-world.git. ↩︎ - You will need to grant Railway permission to access your GitHub repository. If you logged in to Railway using a method other than your GitHub account, you’ll also need to connect to your GitHub account from Railway. ↩︎

Leave a comment